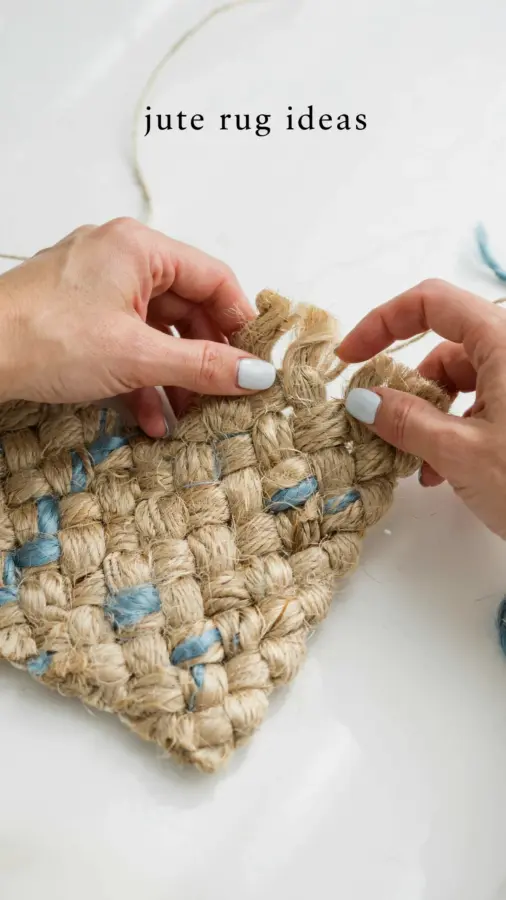
I caught my jute rug looking especially sad last Tuesday. The edges were fraying, the weave was loosening, and one corner had started to curl up like a dried-out leaf, it just looked tired. I had already added it to the donate pile in my head when I remembered a ball of chunky cotton yarn I bought on a whim in March. That is when I decided to try the herringbone crochet stitch for a jute rug makeover, and honestly, it changed the entire piece.
The herringbone crochet stitch is having a real moment right now, and for good reason. It creates this beautiful, woven, almost textured ribbed effect that looks like expensive fabric instead of basic crochet. Unlike a standard slip stitch or single crochet, this stitch lies flat and dense, which is perfect for covering up the rough, scratchy edges of a natural fiber rug. It dresses it up without making it look like you wrapped it in craft supplies. I used it to border the whole perimeter of my 3×5 rug, and the transformation from “dingy” to “designer” took me about two evenings.
## Why herringbone crochet stitch works so well on natural fiber rugs
Jute is a chunky, coarse material that doesn’t play nicely with delicate threads. You need a stitch with serious substance to anchor into that thick weave, and the herringbone fit is unmatched. It pulls the loose strands together and creates a clean, solid line that hides all the ugly wear and tear along the edges.
Another thing that surprised me is how the slant of the stitch mimics the diagonal lines found in natural textures. It blends in beautifully with the raw fibers instead of fighting them. So while you are adding a decorative element, you are actually enhancing the organic, earthy vibe of the rug. It fixes the problem but also upgrades the whole look. Plus, because the stitch is so tight, it really does stop the fraying in its tracks.
## Choosing the right yarn for your rug makeover
Before you start, you need to think about the yarn fiber, because jute is thirsty and abrasive. I learned this the hard way with a scratchy acrylic blend that kept snagging. You want something that will slide smoothly but also hold up to repeated friction, especially if your rug lives in a high-traffic spot like a hallway or living room.
My personal rule for this project is to reach for a cotton or cotton-blend yarn. It grips the jute well without snapping, and it has a natural matte finish that matches the rustic vibe of the rug. If you want a softer feel underfoot, a recycled cotton or linen blend is also fantastic. Just avoid anything fluffy or loosely spun, it will pill and look terrible within a week.
Here is a quick list of what I tested and what I actually recommend:
– **Cotton yarn in a worsted or aran weight:** Best for durability and a clean, crisp edge.
– **Cotton-linen blend:** Adds a slightly slubby, textured look that is very trendy.
– **T-shirt yarn:** Great for a super chunky, statement border, but it can be heavy and pull on a fragile rug.
– **Regular acrylic:** Skip it. It feels cheap against the natural fiber and it stretches out of shape.
## The secret to making the crochet edge lay completely flat
The biggest headache with any rug border is the curling. You will get this weird bowl effect if your tension is too tight, or a wavy mess if it is too loose. The fix is to ensure your foundation row is worked evenly into the jute rug width, and it helps to use a slightly larger hook for that first pass, then switch to your normal size for the herringbone rows.
I also found that working the herringbone stitch loosely on the corners is critical. You need to add an extra stitch or two in the corner curve to allow the rug to keep its shape. If you just a crochet all the way around without thinking about the pivot, the whole border will bunch up and look like a wrinkled skirt. Take your time at the corners.
## How to start a herringbone rug border even if you’re a crochet beginner
I won’t pretend this is the easiest stitch to master, but it is totally doable if you know basic single crochet. The herringbone is essentially a slip stitch with a twist, but you can learn it fast. The movement is a bit tricky in the first ten minutes, and then your hands just get it. I promise. It took me about three rows before I stopped looking at a tutorial on my phone every second.
So you will push your hook into the rug edge, yarn over, and pull through both the rug and the loop on your hook. Slide the hook under the back loop of the stitch you just made, yarn over, and pull through. This creates that angular, V-shaped pattern. Use stitch markers every 20 stitches to keep your count right, because ripping this stitch out of a jute rug is a literal nightmare.
## The seasonal twist that made my rug look so current for fall
This is the part I am honestly most proud of. I initially planned to use a neutral beige, but I ended up choosing a deep, moody rust orange. This got me the exact color palette of terracotta pots and pumpkin spice that is huge in home decor right now. It gave my plain jute rug that warm, autumnal glow that feels so current for this time of year.
I love that this project lets you lean into seasonal trends without buying a whole new rug. You can swap out the border color to match the holidays, using a sage green for spring or a slate blue for winter. The herringbone crochet stitch is a neutral enough texture that the color does all the heavy lifting. It instantly shifted my living room from “I gave up” to “I have a curated aesthetic.”
## Simple ways to maintain and clean the yarn edges
Once you have put all that work into crocheting around your rug, you want to protect it. The main issue is dust and dirt getting trapped between the yarn and the rug fibers. I handle this by vacuuming gently with just the floor attachment, making sure I don’t use a rotating brush since it will definitely grab the yarn and pull it out.
For spills, spot cleaning is your best friend. Mix a tiny drop of mild dish soap with warm water, dab it on the stain, and blot it up. Never rub the yarn, or you’ll distort the herringbone pattern. And keep your rug out of direct sunlight because the new yarn color will bleach and fade while the rest of the rug stays dark. It will end up looking patchy, and nobody wants that.
I also recommend giving the edges a quick steam or a light iron with a damp cloth every few months. This helps relax the yarn and keeps the border looking crisp instead of saggy. It seems like an extra step, but it genuinely makes the whole project look polished for years instead of just for a season.
Look, if you have a natural fiber rug that is on its last legs, please try this before you throw it out. It is a cheap fix, a fun project, and it saves a perfectly good piece of home decor from the landfill. I walked past my rug today and smiled, which is honestly more than I can say for some of the decor I actually paid a lot of money for. If you try herringbone crochet on a rug of your own, I would love to hear about it in the comments.
Leave a Comment