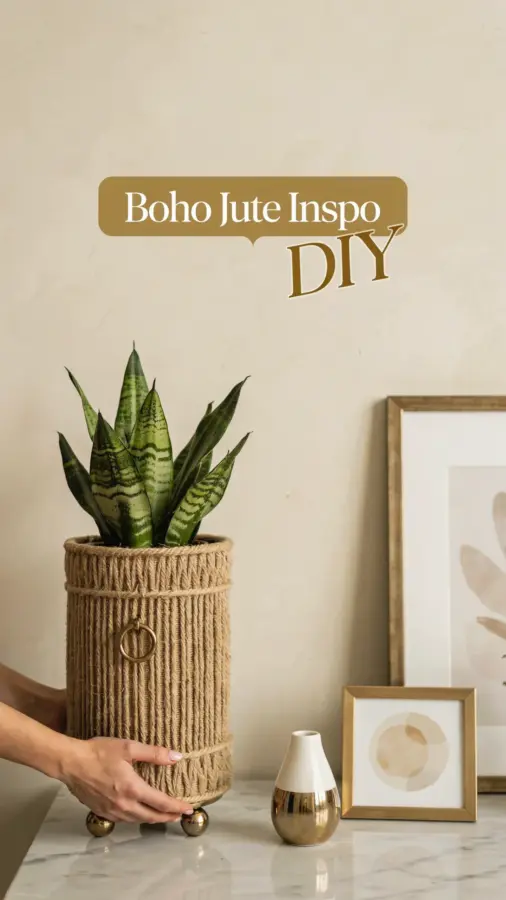
There is something about a DIY jute boho planter that makes any plant lover stop and smile. The texture, the earthiness, the way it softens a ceramic pot. I have made several of these jute wrapped planters over the years, and I have also made plenty of mistakes along the way. If you are ready to try this easy natural decor project, I want to help you skip the frustration. Think of this as your common mistakes guide: I will show you the pitfalls, and then how to avoid them so your planter turns out beautifully the first time.
Choosing the Wrong Jute for Your Boho Decor
Not all jute is created equal. I learned this the hard way when I bought a cheap roll from a discount store. The strands were thin, fuzzy, and broke every time I pulled them tight. For a polished boho jute look, you want a medium weight jute twine that is tightly twisted. Too thin and it takes forever to cover a pot. Too thick and it leaves awkward gaps.
Look for a 3 ply or 4 ply jute twine. It should feel smooth but not slippery. Give it a tug before you buy. If it unravels easily, move on. A good quality jute will hold its shape and give your planter that clean, natural texture you are after. Your bohojute project deserves a material that cooperates.
Using the Wrong Glue (And How to Fix It)
Glue can make or break this craft. Hot glue is tempting because it sets fast, but it can also create lumps and sticky strings that ruin the smooth line of your wrap. I tried it once and ended up with a bumpy planter that looked messy. The better choice is a clear tacky glue or a strong craft glue that dries flexible.
Apply glue in small sections about two inches at a time. Spread it evenly with a small brush or your finger. Then press the jute gently into place. This method takes a little longer, but the result is a diynaturaldecor piece that looks seamless. If you do use hot glue, work in short strips and wipe away any excess immediately.
Starting the Wrap at the Wrong Spot
A common mistake is starting at the top of the pot and working downward. This sounds logical, but gravity works against you. The jute can slip as you wrap, and the bottom edge often ends up uneven. Instead, start at the bottom of the pot. Secure the end of the jute with a dab of glue on the base, then wrap upward.
This way your starting knot or glued end is hidden under the pot. As you work up, the wraps stay tight and the top edge is the last thing you finish. That makes it much easier to trim and tuck neatly. It is a small switch that makes a big difference in your homediycraft project.
Leaving Gaps Between the Wraps
You might be tempted to wrap quickly and leave small spaces between each row of jute. Those gaps will show the original pot underneath, which defeats the purpose of a full jute cover. Even if you like an intentionally rustic look, gaps that are inconsistent look sloppy.
Fix this by overlapping each new wrap slightly over the previous row. About one eighth of an inch overlap is ideal. It keeps the surface solid and hides any glue or pot marks. If you are working with a tapered pot, you may need to adjust the overlap as you go wider. Go slowly and check your work every few rows.
Forgetting to Prepare the Pot Surface
A smooth glazed pot can cause the jute to slide after you glue it. I once wrapped a shiny ceramic pot, and within a day the jute started peeling off. The solution is to rough up the surface slightly or wipe the pot with rubbing alcohol to remove any oils. For plastic pots, a light sanding with fine grit sandpaper helps the glue bond.
If you prefer a no mess approach, you can wrap the pot in a thin layer of masking tape first. The tape gives the glue a textured surface to grip. This extra step takes two minutes and prevents major frustration later. Your juteplanter will stay put for years.
Dealing with Fraying Edges and Loose Ends
Jute frays naturally, especially at cut ends. A frayed tail can unravel your entire wrap if you are not careful. Always seal the cut ends before you start. A tiny dot of clear glue or even clear nail polish on the end of the jute stops it from shredding.
When you finish wrapping, tuck the final end under the previous row using a toothpick or a small crochet hook. Add a drop of glue to hold it. Also run a thin line of glue along the very top edge of the planter to seal all the loops. This simple step keeps your bohodecor looking crisp and finished.
Choosing the Wrong Pot Shape or Size
Not every pot is a good candidate for jute wrapping. Tall skinny pots can be tricky because the jute may slide downward. Wide rounded pots require more patience to curve the wrap evenly. For your first project, pick a straight sided or slightly tapered pot. The simpler the shape, the easier the wrap.
Also consider the size. A very small pot (under three inches tall) is fiddly to wrap by hand. A very large pot (over ten inches) can take hours.
#juteplanter #bohodecor #diynaturaldecor #homediycraft #bohojute