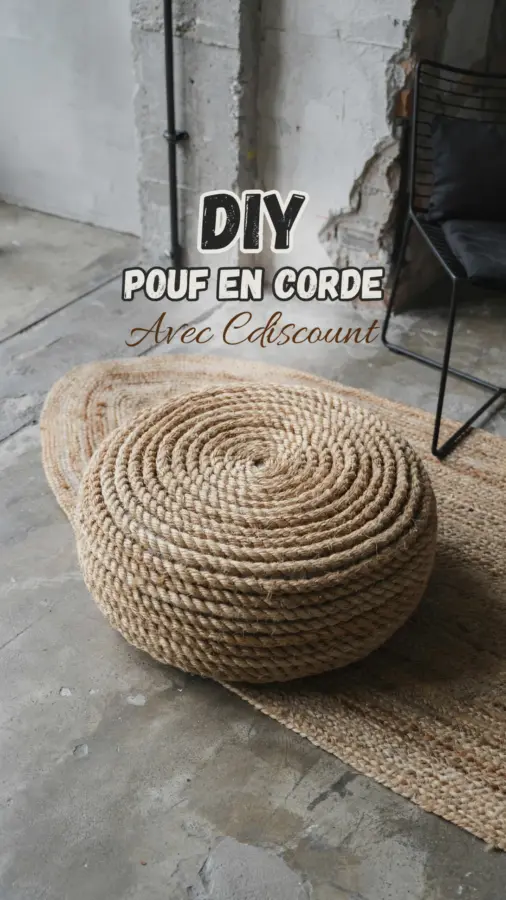
I had been scrolling Pinterest for weeks looking for a cozy, natural seating option that wouldn’t blow my budget. Every pouf I found cost over a hundred dollars, and I just could not justify that for a piece of furniture my cat would inevitably claim. Then I stumbled on a blurry photo of someone wrapping jute rope around a pool noodle, and the whole DIY jute rope pouf idea clicked. I built my first one in a single afternoon, and it cost me less than fifteen dollars. Here is exactly how I did it, what worked, and what I would do differently next time.
Materials You Actually Need for This Pool Noodle Craft
Before you start, gather everything in one spot. I learned the hard way that running for more glue mid wrap is annoying and can mess up your tension. You need the following items, most of which you probably have at home already.
- Six to eight pool noodles (the cheap dollar store kind work fine, just make sure they are all the same thickness)
- A roll of strong packing tape or duct tape
- One large spool of jute rope (I used 100 feet of 6mm jute and had some leftover)
- A hot glue gun with plenty of glue sticks (low temp is safer, high temp holds better)
- Scissors or a sharp utility knife
- A measuring tape or ruler
I also recommend wearing old clothes and working on a protected surface because hot glue drips and jute fibers get everywhere. If you plan to make more than one pouf, buy jute in bulk. It saves money and ensures the color matches across projects.
How to Build the Pool Noodle Base (The Structural Secret)
This pool noodle craft is clever because the noodles give the pouf its shape and bounce without any heavy wood or foam blocks. Start by taping four noodles together side by side into a flat square. I lined them up, pressed them tight, and wrapped tape around the whole bundle every few inches. Do not skimp on tape here. The noodles will try to slide apart as you wrap the jute, so you want them locked together.
Once you have a block of four, make a second identical block. Then stack one on top of the other in a cross pattern (like a plus sign). Tape the two layers together firmly. The goal is a compact, roughly cube shaped bundle that feels solid when you sit on it. If you want a taller pouf, use three layers. For a wider one, use more noodles per layer. I went with two layers of four noodles each, giving me a pouf about 16 inches wide and 10 inches tall.
After taping, check for any sharp edges on the noodle ends. I trimmed off the curved tips of the noodles with a utility knife so the ends were flat and the base sat evenly on the floor. This small step made a big difference when I started wrapping.
Wrapping with Jute Rope: Technique That Actually Works
This is the part where most tutorials get vague, but I found a method that saves time and frustration. Start by gluing the very end of the jute rope to the bottom of the pool noodle base. Press it down and hold for ten seconds. Then begin wrapping the rope around the entire base, row by row, keeping the coils tight against each other.
The trick is to work in sections. Cover one face of the cube completely before moving to the next face. I wrapped each side like I was gift wrapping a box. For the corners, I pulled the rope taut and glued as I went, making sure the rope did not gap or slip. Hot glue cooled fast, so I glued about three inches of rope at a time, pressed it down, and then moved forward.
I will be honest, the first few rows looked messy and I almost gave up. But after ten minutes of wrapping, the pattern started to look intentional and the jute rope covered the pink noodle completely. Keep your tension consistent. If the rope feels loose, pull it tighter and add an extra dab of glue. You can always trim excess rope later, but you cannot easily tighten a loose wrap.
Securing the Ends and Hiding the Glue
When you reach the end of the spool or finish covering the entire pouf, you need to secure the tail of the jute rope. Cut the rope at an angle so the end is a bit tapered. Glue it down firmly and hold until the glue sets. I like to tuck the very tip under the previous coil using the tip of a flat head screwdriver. That hides the cut end and gives a clean finish.
If you have any ugly glue spots on the surface, do not panic. You can cover them with a small dab of warm glue and then press a short piece of jute fiber (pulled from the rope) on top. The fibers blend in almost perfectly. I also ran my hand over the whole pouf and snipped any stray fibers that stuck out. A quick vacuum after that makes it look store bought.
Adding Personality: Make This Easy Home Decor Piece Your Own
Plain jute looks beautiful in a natural, boho space, but you can easily customize this easy home decor project. I added a simple braided trim around the top edge using a different color of jute (a slightly darker brown). Other ideas include painting the pool noodles before wrapping (so the color barely peeks through), or weaving a thin ribbon into the rope as you wrap.
Another option is to make a fabric cover for the pouf before you wrap it, giving the jute a softer base. I tried this on a second pouf and it
#DIYJuteRopePouf #PoolNoodleCraft #EasyHomeDecor #BudgetDIY #NaturalDecor
Leave a Comment